Understanding how to remove a golf cart battery bracket is an essential task for anyone maintaining an electric golf cart. The battery bracket plays a crucial role in securing the battery, preventing it from moving or vibrating during use, which could lead to damage or electrical malfunctions. Whether you’re performing routine maintenance, cleaning, or replacing a faulty battery, knowing how to properly remove the bracket ensures a safe and efficient process. Removing the bracket involves loosening fasteners, carefully detaching the bracket, and dealing with potential issues such as corrosion or rust.
While it may seem like a simple task, improper removal can lead to battery damage, electrical issues, or even personal injury. Having the right tools and following the correct steps ensures that you avoid these pitfalls. In this guide, we’ll walk you through the step-by-step process of how to remove a golf cart battery bracket safely, helping you maintain the overall health of your golf cart’s battery system.
Importance of Removing the Battery Bracket Correctly
Removing the battery bracket properly is a crucial part of golf cart battery maintenance. The battery bracket secures the battery in place, preventing it from moving or vibrating during use. If it is not removed correctly, several issues can arise:
- Battery Damage: Improper removal can result in damage to the battery terminals or cables. This can lead to poor battery performance or even require a battery replacement.
- Personal Safety: Batteries contain hazardous materials, including acid, which can cause burns or corrosion. Mishandling or failing to disconnect the battery correctly can lead to serious injury.
- Component Damage: The bracket is usually attached with bolts or screws that, if not carefully removed, can damage the surrounding parts of the cart, such as the wiring or frame.
- Corrosion Issues: Over time, the battery bracket can become corroded, especially if the cart is exposed to the elements. Improper removal of a corroded bracket may worsen the corrosion or break other parts.
By following the correct procedures when removing the battery bracket, you ensure both the safety of the golf cart’s components and your own well-being. It also helps you maintain the overall health of the battery system, contributing to the smooth operation of the vehicle.
how to remove golf cart battery bracket
What is a Golf Cart Battery Bracket?
A golf cart battery bracket is a metal or plastic frame designed to securely hold the battery in place within the battery compartment. The battery bracket is typically fastened with screws or bolts, ensuring that the battery doesn’t shift or move around while the golf cart is in motion. Given the vibrations and movements that occur when a golf cart is driven over rough terrain, the battery needs to remain stable to avoid damage. Without a properly functioning battery bracket, the battery may become dislodged, leading to potential issues such as broken cables, reduced battery efficiency, or even damage to other components of the golf cart. While small in size, the battery bracket plays a critical role in maintaining the overall safety and performance of the golf cart’s electrical system. When learning how to remove a golf cart battery bracket, understanding its structure and purpose is the first step.
Function of the Battery Bracket
The primary function of a battery bracket in a golf cart is to secure the battery and keep it stable. Golf carts, especially electric ones, rely heavily on their battery system for power. Since batteries are heavy and can be easily damaged if they shift during movement, the battery bracket ensures that the battery stays in a fixed position even when the cart is driven over uneven terrain. This prevents wear and tear on the battery cables and terminals, reducing the risk of electrical malfunctions.
Additionally, a properly secured battery allows for consistent power delivery to the cart’s motor, ensuring smooth operation. The battery bracket also plays an essential role in maintaining the battery’s longevity by protecting it from excessive vibrations that can cause internal damage. Understanding the importance of this component is crucial when learning how to remove the golf cart battery bracket, as removing it improperly could lead to potential issues with battery stability and performance.
Common Types of Battery Brackets in Golf Carts
There are several common types of battery brackets found in golf carts, each designed to accommodate different battery sizes and configurations. The most common type is the standard metal battery bracket, which is often made from steel or aluminum. These brackets are known for their durability and corrosion resistance, which is important since the battery compartment can often be exposed to moisture. Some golf carts feature plastic brackets, which are lighter and resistant to corrosion but may not be as durable as their metal counterparts.
Another type is the adjustable battery bracket, designed to fit various sizes of batteries, making it versatile for carts that may require battery upgrades. Additionally, some golf carts use individual battery straps or clamping systems to secure each battery in place. Understanding the type of battery bracket used in your golf cart is important when approaching the task of how to remove a golf cart battery bracket, as different types may require specific tools or techniques for removal.
how to remove golf cart battery bracket: Tools Required
When it comes to maintaining your golf cart, knowing how to remove a golf cart battery bracket is a valuable skill. This process requires the right tools to ensure that the removal is done safely and efficiently. Both basic and specialized tools are necessary for the job. Each tool serves a specific purpose, ensuring the battery bracket is removed without damaging the battery or surrounding components. Below is a detailed description of the essential tools required.
Basic Tools
Wrench Set
A wrench set is essential for loosening and removing the bolts or screws that secure the battery bracket in place. Depending on the make and model of the golf cart, different sizes of wrenches may be required, so having a complete set ensures you are prepared for various sizes of bolts. It is advisable to use socket wrenches as they offer more grip and leverage compared to open-end wrenches. When learning how to remove a golf cart battery bracket, having the right wrench set is crucial because battery brackets are often tightly secured. A proper wrench ensures that you don’t strip the bolts or screws during removal, which could make future repairs more difficult.
Screwdrivers
Screwdrivers, both flathead and Phillips, are commonly required for removing the screws that secure the battery bracket. Depending on the type of screws used in your golf cart’s battery compartment, you may need to use one or both types of screwdrivers. In many cases, a screwdriver is also useful for prying off any coverings or clips that may be in place around the bracket. Using the right size of screwdriver for the screws is important to avoid damaging the screw heads, which could make removal challenging. When you are learning how to remove a golf cart battery bracket, a versatile set of screwdrivers will be one of your most frequently used tools.
Pliers
Pliers are versatile tools that come in handy when working with the battery bracket. They can be used to grip and turn stubborn nuts or bolts that may be too tight for a wrench. In addition, pliers can help remove any clamps or cables connected to the battery, allowing for easier access to the battery bracket. Needle-nose pliers are particularly useful when working in tight spaces, like the battery compartment, as they allow for precision handling of small components. Proper use of pliers can help speed up the process of removing the bracket without causing damage to the surrounding parts.
Specialized Tools
Battery Terminal Puller
A battery terminal puller is a specialized tool designed to safely and easily remove the battery cables from the terminals without causing damage to the battery or the terminals themselves. Removing the battery terminals is an important step when working on the battery bracket, as it ensures that the electrical system is disconnected, preventing electrical hazards during the removal process. This tool grips the terminal and gently pulls it away from the battery post, which can be especially helpful if the terminals are corroded or stuck. Without a battery terminal puller, there is a risk of damaging the battery post or cable during removal, which could lead to further issues down the road. Using this tool makes learning how to remove a golf cart battery bracket safer and more efficient, especially when dealing with aged or corroded batteries.
Insulated Gloves
Safety is paramount when working with batteries, as they carry electrical currents that can cause shocks or burns. Insulated gloves are specialized tools that protect you from electrical hazards while working on the battery and the bracket. These gloves are designed to insulate your hands from any accidental contact with the battery terminals, which could result in an electric shock. Insulated gloves also provide protection from battery acid, which can leak from damaged or corroded batteries. When learning how to remove a golf cart battery bracket, wearing insulated gloves ensures that your hands are protected from both electrical risks and hazardous materials, allowing you to work with confidence and safety.
Using the right combination of basic and specialized tools is essential for successfully removing the battery bracket, minimizing the risk of damage to the battery or golf cart. Proper preparation and the use of these tools ensure a smooth, safe removal process.
Preparing for the Battery Bracket Removal
Before beginning the removal process, it is important to gather the necessary tools and take some safety precautions. Here are some things to keep in mind:
- Gather your tools: You will need a ratchet and socket set, a screwdriver, and a pair of gloves.
- Park your golf cart on a level surface: This will help to prevent the cart from rolling away while you are working.
- Turn off the ignition and remove the key: This will prevent the cart from accidentally starting.
- Disconnect the negative battery terminal first: This will help to prevent a spark from causing an explosion. Once the negative terminal is disconnected, you can then disconnect the positive terminal.
Disconnecting the Golf Cart
Once you have prepared the area and gathered your tools, you can begin to disconnect the golf cart. Here are the steps involved:
- Locate the battery compartment: The battery compartment is typically located under the seat or in the front of the cart.
- Open the compartment door: Once you have located the compartment, you can open the door to access the batteries.
- Disconnect the negative battery terminal: Use the ratchet and socket set to loosen the nut on the negative battery terminal. Once the nut is loose, you can slide the terminal off of the post.
- Disconnect the positive battery terminal: Repeat the same process for the positive battery terminal.
Locating the Battery Bracket
The battery bracket is the metal frame that holds the batteries in place. It is typically located around the edges of the battery compartment. Once you have disconnected the batteries, you can begin to locate the bracket.
Inspecting the Battery and Surrounding Area for Issues
Before you begin to remove the bracket, it is important to inspect the battery and surrounding area for any issues. This will help to prevent any damage to the cart or batteries during the removal process. Here are some things to look for:
- Corrosion: Check the battery terminals, cables, and bracket for signs of corrosion. Corrosion can cause electrical problems and should be cleaned up before proceeding.
- Damage: Inspect the battery bracket for any signs of damage, such as cracks or bends. If the bracket is damaged, it should be replaced before proceeding.
- Fluid leaks: Check the battery compartment for any signs of fluid leaks. If there is a leak, it should be repaired before proceeding.
Additional Tips
Here are some additional tips for removing a golf cart battery bracket:
- Work slowly and carefully: Removing a battery bracket can be a delicate process. Take your time and avoid using excessive force.
- Wear gloves and eye protection: Battery acid can be corrosive and can cause burns. Wear gloves and eye protection to protect yourself from injury.
- Have someone assist you: If you are not comfortable working alone, have someone assist you.
- Consult your owner’s manual: If you are unsure about how to remove the battery bracket on your golf cart, consult your owner’s manual for specific instructions.
How to Safely Disconnect the Golf Cart Battery
Identifying Battery Terminals (Positive vs. Negative)
Golf cart batteries typically have two terminals: a positive terminal and a negative terminal. The positive terminal is usually marked with a “+” sign, while the negative terminal is usually marked with a “-” sign. It is important to identify the terminals correctly before disconnecting the battery, as connecting the terminals in the wrong order can cause a spark, which could lead to an explosion.
Step-by-Step Guide to Disconnecting Battery Cables
Here are the steps involved in safely disconnecting a golf cart battery:
- Park the golf cart on a level surface: This will help to prevent the cart from rolling away while you are working.
- Turn off the ignition and remove the key: This will prevent the cart from accidentally starting.
- Put on safety glasses and gloves: Battery acid can be corrosive and can cause burns. Wear safety glasses and gloves to protect yourself from injury.
- Locate the battery compartment: The battery compartment is typically located under the seat or in the front of the cart.
- Open the compartment door: Once you have located the compartment, you can open the door to access the batteries.
- Identify the negative battery terminal: The negative terminal is usually marked with a “-” sign.
- Loosen the nut on the negative battery terminal: Use a wrench or socket wrench to loosen the nut on the negative battery terminal.
- Slide the negative terminal off of the post: Once the nut is loose, you can slide the negative terminal off of the post.
- Identify the positive battery terminal: The positive terminal is usually marked with a “+” sign.
- Loosen the nut on the positive battery terminal: Use a wrench or socket wrench to loosen the nut on the positive battery terminal.
- Slide the positive terminal off of the post: Once the nut is loose, you can slide the positive terminal off of the post.
- Keep the terminals separated: Once the terminals are disconnected, keep them separated from each other. This will help to prevent a spark from causing an explosion.
Safety Tips During Battery Disconnection
Here are some safety tips to keep in mind when disconnecting a golf cart battery:
- Work slowly and carefully: Disconnecting a battery can be a delicate process. Take your time and avoid using excessive force.
- Never touch the terminals with bare hands: Battery acid can be corrosive and can cause burns. Always wear gloves when handling battery terminals.
- Never disconnect the positive terminal first: Connecting the terminals in the wrong order can cause a spark, which could lead to an explosion. Always disconnect the negative terminal first.
- Keep the terminals separated: Once the terminals are disconnected, keep them separated from each other. This will help to prevent a spark from causing an explosion.
- Work in a well-ventilated area: Battery acid can emit fumes that can be harmful to your health. Work in a well-ventilated area to avoid breathing in the fumes.
- Have someone assist you: If you are not comfortable working alone, have someone assist you.
- Consult your owner’s manual: If you are unsure about how to disconnect the battery on your golf cart, consult your owner’s manual for specific instructions.
Step-by-Step Guide how to remove golf cart battery bracket
Removing the battery bracket from a golf cart is a task that requires attention to detail and the correct process to ensure both safety and efficiency. Below is a step-by-step guide outlining the important actions needed to successfully remove the bracket. Understanding how to remove a golf cart battery bracket the right way can prevent damage to the battery and surrounding components, making it easier to complete any necessary maintenance or replacements.
Loosening the Fasteners or Screws
The first step in removing a golf cart battery bracket is to loosen the fasteners or screws that hold the bracket in place. These fasteners are often bolts or screws and are typically located around the perimeter of the bracket. Using a wrench or screwdriver, depending on the type of fastener, carefully turn them counterclockwise to loosen them.
It’s important to ensure that you don’t strip the screws or bolts by using the wrong tool or applying too much force. If you encounter resistance, applying a penetrating oil can help loosen tight or rusted fasteners. When learning how to remove a golf cart battery bracket, starting with loosening the fasteners ensures that the bracket can be removed without damaging any components.
Safely Detaching the Bracket from the Battery
Once the fasteners are removed, the next step is to safely detach the bracket from the battery. This can be done by gently lifting the bracket away from the battery, taking care not to disturb the battery terminals or cables. It is important to avoid using excessive force, as this could damage the battery casing or surrounding wiring. Depending on the type of battery bracket, some may have additional clips or supports that need to be unfastened before the bracket can be completely removed.
Detaching the bracket with care ensures that the battery remains intact and that no other parts of the golf cart’s electrical system are harmed. This step is critical when learning how to remove a golf cart battery bracket to ensure that the process is done smoothly and safely.
Handling Corroded or Rusted Brackets
One of the most common challenges in removing a battery bracket is dealing with corrosion or rust. Over time, the battery and bracket can become corroded due to exposure to battery acid or moisture, making it difficult to remove the bracket. If you find that the bracket is corroded or rusted, it’s essential to use caution. Applying a corrosion cleaner or rust remover can help dissolve the buildup, allowing the fasteners and bracket to be removed more easily.
In extreme cases, you may need to use specialized tools, like a battery terminal puller or pliers, to help pry off the bracket without damaging the battery. When handling corroded components, wearing insulated gloves is important to protect your hands from harmful chemicals. Properly managing rusted brackets is an important part of knowing how to remove a golf cart battery bracket without causing further damage to the golf cart’s battery system.
Reinstalling the Battery Bracket (Optional)
Once the battery bracket has been removed for maintenance or replacement, the next step may involve reinstalling a new or cleaned bracket. Ensuring that the bracket is properly reinstalled is crucial for the safe operation of the golf cart. If the bracket is not securely fastened, the battery may shift during use, leading to damage or electrical issues. Below is a detailed guide on how to choose and install a replacement bracket.
Choosing the Right Replacement Bracket
When choosing a replacement battery bracket for your golf cart, it’s important to ensure compatibility with your specific model and battery type. Golf cart batteries come in different sizes, so the bracket you choose must securely hold the battery in place. Most golf carts use a standard size, but there are also custom and adjustable brackets available for non-standard battery configurations. When selecting a new bracket, consider its material—whether metal or plastic—ensuring it is durable and corrosion-resistant. If your old bracket showed signs of rust or wear, opting for a higher-quality replacement might be a good investment. Knowing how to remove a golf cart battery bracket can also give you insights into what type of bracket will work best in your vehicle, making it easier to pick the right one.
Step-by-Step Guide to Installing a New Battery Bracket
- Position the Bracket: Start by positioning the new battery bracket over the battery in its designated place within the compartment. Make sure the bracket lines up with the holes where the fasteners will be attached.
- Insert the Fasteners: Once the bracket is properly aligned, insert the screws or bolts into the designated holes. Begin tightening them by hand to ensure they thread properly before using any tools.
- Tighten the Fasteners: Using a wrench or screwdriver, tighten the fasteners securely. Be careful not to overtighten, as this could strip the bolts or cause damage to the battery compartment.
- Check for Stability: Once the bracket is fastened, gently wiggle it to ensure it is securely holding the battery in place. There should be no movement or rattling.
By following these steps, you can successfully install a new battery bracket. Understanding how to remove a golf cart battery bracket can also aid in the proper installation process by giving you a clear idea of how the bracket fits and functions.
Ensuring Secure Fit and Proper Functionality
After the new bracket is installed, it’s essential to verify that it is properly fitted and functioning as intended. A secure fit means that the battery is held firmly in place, with no room for shifting or vibration during movement. This is critical to prevent potential damage to the battery cables or terminals, which could lead to electrical issues. You should also check that the fasteners are tightened enough to withstand the vibrations and forces exerted when the golf cart is in use.
If the bracket is loose, it could lead to wear and tear on the battery or other components, eventually causing performance issues. Taking the time to ensure a secure fit will prevent future problems and help maintain the cart’s overall functionality. Knowing how to remove a golf cart battery bracket and reinstall it properly ensures the long-term stability of the golf cart’s battery system.
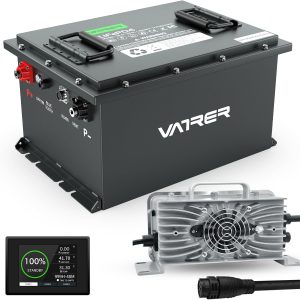
36V 105Ah LiFePO4 Golf Cart Battery
Conclusion:
Knowing how to remove a golf cart battery bracket is a valuable skill for any golf cart owner, as it allows for proper battery maintenance, cleaning, and replacement when necessary. By following the correct steps, from loosening fasteners to safely detaching the bracket and handling corroded parts, you can ensure that the process is done efficiently without causing damage to the battery or surrounding components. Using the right tools and techniques not only makes the task easier but also helps maintain the overall performance of the golf cart. With the proper care, you can extend the lifespan of your battery and ensure that your golf cart operates smoothly.