Charging your trolling motor battery is a crucial task that ensures your time on the water is smooth and uninterrupted. Whether you’re out fishing or just enjoying a leisurely boat ride, the last thing you want is for your trolling motor to run out of juice. Understanding how to charge trolling motor battery quickly and safely can make all the difference in extending your battery’s life and keeping your motor running efficiently. Unlike regular car batteries, trolling motor batteries are deep-cycle batteries designed to provide a consistent power output over extended periods. This means they require a different charging approach to maintain their efficiency and longevity.
When it comes to charging a trolling motor battery, there are a few key steps and considerations to keep in mind. From selecting the right charger to ensuring you follow proper safety procedures, every detail matters. Using the wrong charger or neglecting basic safety precautions can lead to damage, not just to the battery, but also to your motor and, potentially, your boat. Additionally, knowing how to monitor the charging process and avoid common pitfalls like overcharging can help prevent costly mistakes.
In this guide, we’ll walk you through the essential steps on how to charge a trolling motor battery, offering practical tips to ensure the process is both quick and safe. Whether you’re a seasoned boater or a beginner, understanding these basics will help you get the most out of your trolling motor battery, ensuring you’re always ready for your next adventure on the water.

What is a Trolling Motor Battery?
A trolling motor battery is a specialized type of deep-cycle battery designed specifically for powering trolling motors on boats. Unlike traditional car batteries, which deliver a short burst of energy to start an engine, trolling motor batteries provide a steady and consistent flow of power over an extended period. This characteristic makes them essential for anglers and recreational boaters who rely on trolling motors to navigate silently and efficiently across lakes and rivers.
Types of Trolling Motor Batteries
There are several types of trolling motor batteries, each with its own advantages and disadvantages:
Flooded Lead Acid Batteries
Flooded lead acid batteries are the most common and traditional type of trolling motor batteries. These batteries use lead plates submerged in a liquid electrolyte solution, usually a mixture of sulfuric acid and water. Due to their design, they require regular maintenance, including checking and refilling the electrolyte levels. Despite this, they are widely used because of their affordability and reliable performance.
Advantages:
- Cost-Effective: Generally, the most affordable option among deep-cycle batteries.
- Widely Available: Easy to find and replace.
- Reliable Performance: Proven technology that provides consistent power.
Disadvantages:
- Maintenance Required: Needs regular checking and refilling of electrolyte levels.
- Spill Risk: Prone to spillage if not handled properly.
- Shorter Lifespan: Typically has a shorter life compared to AGM and lithium-ion batteries.
AGM (Absorbed Glass Mat) Batteries
AGM batteries are a sealed type of lead-acid battery where the electrolyte is absorbed into a fiberglass mat, making them maintenance-free. This design prevents spills and leaks, making AGM batteries safer and more durable, especially in rough conditions. They handle deep discharges better than flooded lead acid batteries and are often chosen for their longer lifespan and reliability.
Advantages:
- Maintenance-Free: No need to check or refill electrolyte levels.
- Spill-Proof: The sealed design prevents leaks and spills.
- Durable: Handles deep discharges and vibrations well.
Disadvantages:
- Higher Cost: More expensive than flooded lead acid batteries.
- Heavier: Typically heavier than lithium-ion batteries.
- Lower Energy Density: Provides less energy per unit weight compared to lithium-ion batteries.
Lithium-Ion Batteries
Lithium-ion batteries represent the latest advancement in battery technology for trolling motors. These batteries are much lighter, charge faster, and have a significantly longer lifespan compared to lead-acid batteries. Lithium-ion batteries are highly efficient and can be deeply discharged without losing their capacity, making them ideal for frequent and extended use on the water. However, they are also the most expensive option on the market.
Advantages:
- Lightweight: Significantly lighter than lead-acid batteries.
- Longer Lifespan: Can last up to 10 years or more with proper care.
- Fast Charging: Charges faster than other battery types.
- High Efficiency: Delivers consistent power output and can handle deep discharges without losing capacity.
Disadvantages:
- Expensive: The most costly option among trolling motor batteries.
- Sensitive to Temperature: Performance can be affected by extreme temperatures.
- Requires Specific Chargers: Must be charged with a compatible charger to avoid damage.
Safety Precautions Before Charging
When it comes to charging your trolling motor battery, safety should be your top priority. Understanding and following the necessary safety precautions before charging a trolling motor battery can prevent accidents, extend the life of your battery, and ensure your equipment operates smoothly. Here are the detailed steps and considerations you should take before beginning the charging process.
1. Choose a Well-Ventilated Area
Charging a trolling motor battery can produce gases, particularly hydrogen, which is highly flammable. Always charge the battery in a well-ventilated area to disperse these gases and reduce the risk of explosion. Avoid enclosed spaces and ensure there’s adequate airflow around the charging setup.
2. Wear Protective Gear
Before handling your trolling motor battery, put on appropriate protective gear, including safety gloves and goggles. This is especially important when dealing with flooded lead acid batteries, as they contain corrosive sulfuric acid that can cause severe burns if it comes into contact with your skin or eyes.
3. Inspect the Battery and Charger
Before connecting your charger, inspect the trolling motor battery for any signs of damage, such as cracks, leaks, or corrosion around the terminals. Damaged batteries should not be charged and may need to be replaced. Additionally, check the charger for any defects or frayed wires to ensure it’s safe to use.
4. Ensure Proper Charger Compatibility
Using the correct charger is crucial. Different types of trolling motor batteries—such as flooded lead acid, AGM, and lithium-ion—require specific charging profiles. Make sure your charger is compatible with the type of battery you are charging. Using an incorrect charger can lead to overcharging, overheating, or even damaging the battery permanently.
5. Disconnect the Battery from the Trolling Motor
Before charging, always disconnect the trolling motor battery from the motor to prevent any electrical shorts or damage to the motor’s electronics. This step is essential to avoid accidental power surges that could harm your equipment.
6. Secure the Battery
Ensure the trolling motor battery is placed on a stable, non-conductive surface during charging. Avoid placing the battery on metal surfaces, as this can create an electrical circuit if the terminals come into contact with the surface. A secure, stable location minimizes the risk of the battery tipping over or connections coming loose during charging.
7. Avoid Charging Near Flammable Materials
Keep the charging setup away from flammable materials such as fuel, cleaning products, or anything that could ignite if exposed to sparks or heat. This precaution is vital to prevent fires or explosions in the event of an accident.
8. Follow Manufacturer’s Guidelines
Always refer to the manufacturer’s instructions for both the battery and the charger before starting the charging process. These guidelines are tailored to the specific equipment you are using and provide crucial information on correct charging practices, such as voltage settings, charging times, and safety warnings.
9. Monitor the Charging Process
While it may be tempting to leave the battery to charge unattended, it’s important to monitor the charging process. This allows you to detect any issues early, such as overheating or unusual smells, and take action before they escalate into bigger problems.
10. Handle Connections Carefully
When connecting the charger to the battery, attach the positive (red) clamp to the positive terminal first, followed by the negative (black) clamp to the negative terminal. When disconnecting, remove the negative clamp first. This sequence helps prevent accidental short circuits that could cause sparks or battery damage.
By adhering to these safety precautions before charging a trolling motor battery, you can ensure a safer charging process and prolong the life of your battery. Proper care and attention to detail not only protect you and your equipment but also contribute to more enjoyable and worry-free time on the water.
Tools You Will Need
When preparing to charge your trolling motor battery, having the right tools on hand is essential to ensure a safe and efficient process. Here’s a list of tools you will need:
1. Battery Charger
The most important tool is a battery charger compatible with your specific trolling motor battery type, whether it’s a flooded lead acid, AGM, or lithium-ion battery. Ensure the charger is designed to handle the voltage and amperage requirements of your battery.
2. Safety Gloves
Wear safety gloves to protect your hands from acid, electrical shorts, or any accidental contact with harmful substances. Gloves provide a barrier between your skin and any corrosive materials or sharp edges you might encounter.
3. Safety Goggles
Safety goggles are essential to protect your eyes from potential splashes of battery acid or debris that might be present around the battery terminals. This is especially important when dealing with flooded lead acid batteries.
4. Multimeter
A multimeter is useful for checking the voltage of your battery before and after charging. This tool helps you ensure the battery is charged to the correct level and allows you to diagnose any issues with the battery or charger.
5. Battery Terminal Cleaner
Over time, battery terminals can accumulate corrosion, which can interfere with the charging process. A battery terminal cleaner, which typically includes a wire brush or cleaning solution, helps remove corrosion to ensure a solid connection between the battery and charger.
6. Non-Conductive Surface
When charging your trolling motor battery, it’s crucial to place it on a stable, non-conductive surface, such as a wooden board or plastic tray. This minimizes the risk of electrical shorts or accidental contact with conductive materials.
7. Cable Clamps
Cable clamps or battery clips are necessary to securely connect the charger to the battery terminals. Ensure they are in good condition, free from rust or damage, and that they provide a strong connection.
8. Ventilation Fan (Optional)
If you’re charging the battery in an enclosed space, a ventilation fan can help disperse any gases produced during charging, particularly with flooded lead acid batteries, which can emit hydrogen gas.
9. Battery Tray or Box
A battery tray or box helps secure the battery during charging, reducing the risk of tipping over or spilling. It also provides additional protection against accidental damage or contact with other objects.
10. Fire Extinguisher
While it’s unlikely, charging any type of battery can carry the risk of fire. Having a fire extinguisher nearby, specifically one rated for electrical fires, is a good safety precaution.
By gathering these tools before you start charging your trolling motor battery, you’ll be better prepared to handle the process safely and efficiently. Proper preparation ensures not only the safety of you and your equipment but also the longevity and performance of your trolling motor battery.
Step-by-Step Charging Process – How to Properly Charge a Trolling Motor Battery
To ensure your trolling motor is always ready for your next adventure, it’s essential to know how to charge a trolling motor battery properly. Charging your battery correctly not only extends its lifespan but also ensures it delivers reliable power when you need it most. Here’s a detailed, step-by-step guide on how to safely and effectively charge your trolling motor battery.
Step 1: Turn Off the Trolling Motor
Before you begin the charging process, make sure the trolling motor is completely turned off. This step is crucial for preventing any electrical issues or short circuits. Disconnect the trolling motor from the battery to avoid any accidental activation during charging. It’s also a good practice to remove the battery from the boat if possible, especially if the charging area is far from where your boat is docked or stored.
Step 2: Inspect the Battery
Before connecting the charger, take a few minutes to inspect the battery for any visible signs of damage. Look for cracks, bulging, or leaks, especially if you’re using a flooded lead acid battery. Check the terminals for any corrosion, which can interfere with the charging process. If you spot any issues, clean the terminals with a battery terminal cleaner or a mixture of baking soda and water. If the battery is damaged, it may be unsafe to charge, and you should consider replacing it.
Step 3: Connect the Charger
Now that you’ve inspected the battery, it’s time to connect the charger. Ensure you have a charger that is compatible with your battery type—whether it’s a flooded lead acid, AGM, or lithium-ion battery. Start by connecting the positive (red) clamp from the charger to the positive terminal on the battery. Then, connect the negative (black) clamp to the negative terminal. Ensure the connections are secure and that the clamps are making good contact with the battery terminals. Double-check that the charger is plugged into a safe and properly grounded power source.
Step 4: Set the Charger Settings
Next, set the charger to the appropriate settings for your battery. Many modern chargers come with automatic settings that adjust based on the battery type, but if your charger requires manual input, be sure to select the correct voltage and charging mode. For example, flooded lead acid and AGM batteries typically require a lower charging current than lithium-ion batteries. If available, use a slow or trickle charge setting to avoid overcharging and to maximize battery life. Charging at a lower current may take longer, but it’s safer and better for your battery in the long run.
Step 5: Monitor the Charging Process
Once everything is set up, turn on the charger and allow it to begin charging the battery. It’s important to monitor the charging process, especially if your charger doesn’t have an automatic shut-off feature. Keep an eye on the charger’s indicators to ensure everything is progressing smoothly. Some chargers display the charging status, allowing you to track how much power the battery has absorbed. If you notice the battery becoming excessively hot or if you smell any burning or chemical odors, immediately disconnect the charger and inspect the battery.
Step 6: Disconnect the Charger When Done
When the battery is fully charged, the charger should indicate that the process is complete, either through an indicator light or a display. At this point, turn off the charger before disconnecting it from the battery. Start by removing the negative (black) clamp first, followed by the positive (red) clamp. This order reduces the risk of short circuits. After disconnecting, store the charger in a safe place and wipe down the battery if necessary. If you removed the battery from the boat, carefully reinstall it, ensuring all connections are secure.
By following this step-by-step guide on how to charge a trolling motor battery, you can ensure that your battery remains in top condition, providing you with reliable power every time you head out on the water. Proper charging techniques not only extend the life of your battery but also improve its overall performance, ensuring you can enjoy your time on the water without any interruptions.
Charging Different Types of Batteries
Charging different types of trolling motor batteries requires specific approaches tailored to each battery type. Understanding the unique characteristics and safety precautions of flooded lead acid, AGM, and lithium-ion batteries ensures that you charge them properly, enhancing their performance and longevity. Here’s a detailed guide on how to charge each type of trolling motor battery, along with essential safety precautions.
Charging Flooded Lead Acid Batteries
1. Charging Process: Flooded lead acid batteries are the most traditional type, often used in trolling motors. They require careful handling during the charging process due to their liquid electrolyte.
- Step 1: Begin by checking the electrolyte levels. If they are low, top them off with distilled water before charging. Never overfill, as the liquid expands during charging.
- Step 2: Connect the charger’s positive (red) clamp to the positive terminal and the negative (black) clamp to the negative terminal of the battery.
- Step 3: Set the charger to the appropriate voltage and current for a slow or trickle charge, which is ideal for flooded lead acid batteries.
- Step 4: Start the charging process, ensuring the area is well-ventilated to dissipate any hydrogen gas produced during charging.
Safety Precautions:
- Wear Protective Gear: Always wear safety gloves and goggles to protect against accidental contact with sulfuric acid.
- Ventilation: Charge the battery in a well-ventilated area to avoid the buildup of hydrogen gas, which is highly flammable.
- Check Electrolyte Levels: Ensure electrolyte levels are adequate before charging to prevent battery damage.
- Avoid Overcharging: Overcharging can cause the electrolyte to overheat and potentially boil, leading to dangerous spills or explosions.
Charging AGM Batteries
1. Charging Process: AGM (Absorbed Glass Mat) batteries are a sealed type of lead-acid battery that offers a maintenance-free experience, making them popular for trolling motors.
- Step 1: Connect the charger’s positive (red) clamp to the positive terminal and the negative (black) clamp to the negative terminal of the battery.
- Step 2: Use a charger specifically designed for AGM batteries, as these require a different charging profile than flooded lead acid batteries.
- Step 3: Set the charger to the recommended voltage for AGM batteries, which is typically higher than that for flooded lead acid batteries.
- Step 4: Start charging and monitor the battery to ensure it does not overheat, as AGM batteries are sensitive to overcharging.
Safety Precautions:
- Use the Right Charger: Ensure the charger is compatible with AGM batteries to prevent overcharging, which can damage the battery.
- Temperature Monitoring: Although AGM batteries are more robust, they can still overheat if charged incorrectly. Monitor the temperature during charging.
- Avoid Deep Discharge: AGM batteries should not be deeply discharged frequently, as this can reduce their lifespan.
Charging Lithium-Ion Batteries
1. Charging Process: Lithium-ion batteries are the most advanced type of battery available for trolling motors, offering excellent energy efficiency and a long lifespan.
- Step 1: Ensure the charger is specifically designed for lithium-ion batteries. Using an incorrect charger can damage the battery.
- Step 2: Connect the charger’s positive (red) clamp to the positive terminal and the negative (black) clamp to the negative terminal of the battery.
- Step 3: Set the charger to the recommended voltage, typically 12V or 24V depending on your battery’s configuration. Lithium-ion batteries can handle higher charging currents, which means faster charging times.
- Step 4: Start charging and monitor the process. Most lithium-ion chargers will automatically shut off when the battery is fully charged, preventing overcharging.
Safety Precautions:
- Use a Compatible Charger: Always use a charger specifically designed for lithium-ion batteries to avoid overcharging and potential fire hazards.
- Avoid Extreme Temperatures: Do not charge lithium-ion batteries in extremely hot or cold environments, as this can affect their performance and safety.
- Check for Built-In Protection: Many lithium-ion batteries have built-in protection circuits, but it’s still important to monitor the charging process, especially with older or lower-quality batteries.
General Safety Tips for All Battery Types
- Inspect Before Charging: Always inspect the battery and charger for any damage before starting the charging process.
- Disconnect After Charging: Once charging is complete, disconnect the charger starting with the negative terminal to prevent short circuits.
- Store Properly: After charging, store your batteries in a cool, dry place away from direct sunlight and heat sources.
By following these detailed steps and safety precautions for charging flooded lead acid, AGM, and lithium-ion trolling motor batteries, you can ensure a safe and efficient charging process. Proper charging practices not only extend the life of your batteries but also guarantee reliable performance on the water, allowing you to focus on enjoying your time fishing or boating.
Common Charging Mistakes to Avoid
When it comes to charging your trolling motor battery, avoiding common mistakes is crucial to maintaining the battery’s health and ensuring your safety. Two of the most common errors are overcharging the battery and using the wrong charger. Here’s a detailed look at these mistakes and how to avoid them.
Overcharging Your Battery
What is Overcharging? Overcharging occurs when a battery is charged beyond its capacity, causing it to remain connected to the charger even after it has reached full charge. This can happen if the charger does not have an automatic shut-off feature or if the charging settings are not appropriately adjusted for the battery type.
Why is Overcharging Harmful?
- Heat Buildup: Overcharging generates excessive heat, which can cause the battery’s internal components to degrade. This heat can lead to swelling, leaks, and, in severe cases, the battery might even explode.
- Reduced Lifespan: Consistently overcharging a battery reduces its overall lifespan by causing it to lose capacity more quickly over time.
- Electrolyte Loss: In flooded lead acid batteries, overcharging can cause the electrolyte (sulfuric acid and water mixture) to evaporate, leading to lower levels and potentially damaging the battery.
How to Avoid Overcharging:
- Use a Smart Charger: Invest in a smart charger with an automatic shut-off feature that stops charging once the battery is full. This ensures that your battery won’t be exposed to prolonged charging.
- Monitor Charging: Even with a smart charger, it’s a good practice to monitor the charging process occasionally. This helps you catch any issues early.
- Follow Manufacturer’s Guidelines: Always adhere to the manufacturer’s instructions regarding charging times and settings. If they suggest a specific charging duration, set a timer to remind yourself to disconnect the charger.
Using the Wrong Charger
Why is Using the Wrong Charger a Mistake? Using a charger that is not designed for your specific battery type can cause significant damage. Different types of trolling motor batteries—flooded lead acid, AGM, and lithium-ion—have unique charging requirements, including different voltage levels and charging currents.
Consequences of Using the Wrong Charger:
- Overcharging or Undercharging: A charger that doesn’t match your battery type can either overcharge or undercharge it. Overcharging can cause the issues mentioned above, while undercharging can lead to incomplete charging cycles, reducing the battery’s efficiency.
- Battery Damage: Lithium-ion batteries, for example, require a charger with a specific charging profile. Using a charger meant for lead acid batteries can permanently damage a lithium-ion battery.
- Safety Hazards: Using an incompatible charger can increase the risk of electrical shorts, overheating, and even fires, especially if the charger is not equipped with the necessary safety features for your battery type.
How to Avoid Using the Wrong Charger:
- Verify Charger Compatibility: Always check that the charger is compatible with the type of battery you are using. The charger should clearly indicate which battery types it supports.
- Use Manufacturer-Recommended Chargers: Whenever possible, use a charger recommended by the battery manufacturer. These chargers are specifically designed to meet the battery’s charging needs.
- Don’t Mix and Match Chargers: Avoid using chargers from different brands or older chargers that may not be designed for modern batteries. Stick to using the charger that came with your battery or one that is verified to be compatible.
By understanding and avoiding these common charging mistakes—overcharging your battery and using the wrong charger—you can extend the life of your trolling motor battery and ensure it remains safe and reliable. Proper charging practices are essential for maintaining the performance of your trolling motor, allowing you to enjoy your time on the water without any unexpected power issues.
a versatile and high-quality charger to Charge a Trolling Motor Battery
When selecting a charger for your trolling motor battery, it’s important to choose one that is compatible with your battery type and provides reliable, efficient charging. Here’s a recommendation for a versatile and high-quality charger:
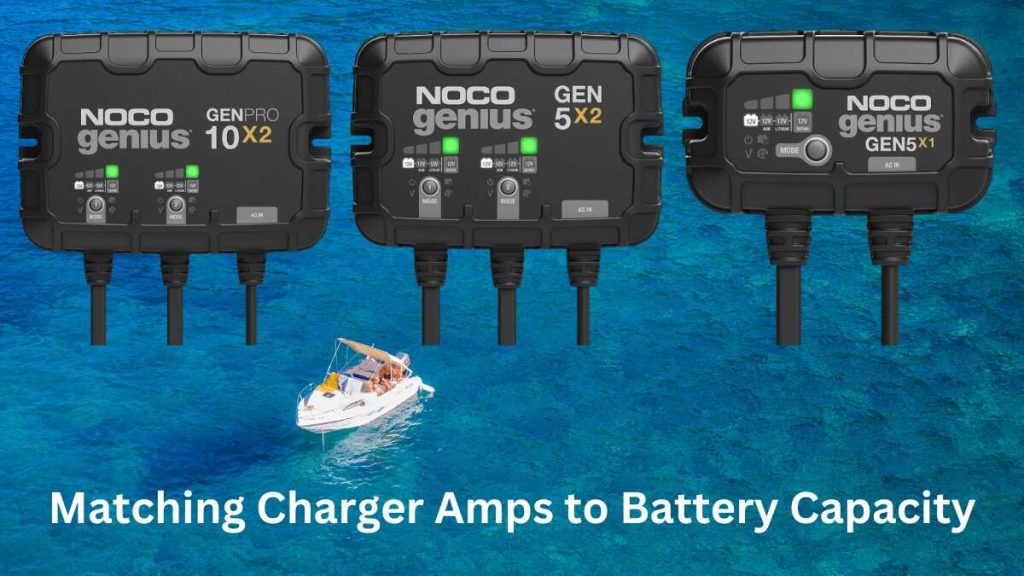
NOCO Genius GEN5X2 – 10A 2-Bank On-Board Marine Battery Charger
Overview: The NOCO Genius GEN5X2 is a smart, multi-bank charger that’s ideal for charging trolling motor batteries. It’s designed to work with a variety of battery types, including flooded lead acid, AGM, and lithium-ion batteries. This charger is highly regarded for its safety features, durability, and ease of use.
Key Features:
- Multi-Bank Charging: The GEN5X2 features two independent charging banks, allowing you to charge two batteries simultaneously. This is perfect if you have multiple trolling motor batteries or need to charge a house battery alongside your trolling motor battery.
- Smart Charging Technology: The charger uses advanced smart charging technology that automatically adjusts the charging rate based on the battery’s condition and type. It provides fast, efficient charging without the risk of overcharging.
- Fully Sealed and Waterproof: The GEN5X2 is designed for marine environments, with a fully sealed, waterproof casing that protects it from water, dust, and debris. This makes it an excellent choice for use on boats.
- Integrated Thermal Sensor: The charger has an integrated thermal sensor that detects ambient temperature and adjusts the charge to prevent overheating in hot climates and undercharging in cold climates.
- Safe and Reliable: This charger offers a range of safety features, including spark-proof technology, reverse polarity protection, and overcharge protection, ensuring safe operation.
Why It’s Recommended:
The NOCO Genius GEN5X2 is recommended because of its versatility, ease of use, and robust safety features. It’s compatible with all major types of trolling motor batteries, and its dual-bank design means you can charge multiple batteries at once, saving time and ensuring that your trolling motor is always ready to go. The smart charging technology and temperature compensation make it a set-and-forget solution, providing peace of mind that your battery is being charged correctly.
Whether you’re using a flooded lead acid, AGM, or lithium-ion battery, the NOCO Genius GEN5X2 is a reliable choice that will keep your trolling motor battery in top condition.
Conclusion: how to charge a trolling motor battery
In conclusion, understanding how to charge a trolling motor battery is essential for ensuring optimal performance and longevity of your equipment. By following the proper steps—turning off the trolling motor, inspecting the battery, connecting the charger correctly, setting the appropriate charging settings, and monitoring the process—you can effectively charge your battery while avoiding common mistakes such as overcharging or using the wrong charger. Each type of trolling motor battery, whether it’s flooded lead acid, AGM, or lithium-ion, has its specific requirements and safety precautions that must be adhered to for the best results.
By using a high-quality charger and staying informed about the best practices, you’ll ensure that your trolling motor battery remains in excellent condition, providing reliable power for all your boating and fishing adventures. Embracing these best practices will help you maximize battery life and performance, allowing you to focus on enjoying your time on the water.